In this part, we will learn about amend and cherry-pick. I use amend almost daily. Cherry-pick is pretty useful and asked in interviews at times.
amend
Makes changes to the most recent commit.
Caution: Use on a Local commit since amend rewrites the history of commits.
When does amend come to the rescue?
- Adding files you forgot to commit
- Removing files you commit by mistake
- Editing the commit message
How does it work?
Amend removes the old commit and adds a new one. HEAD then points to the new commit.
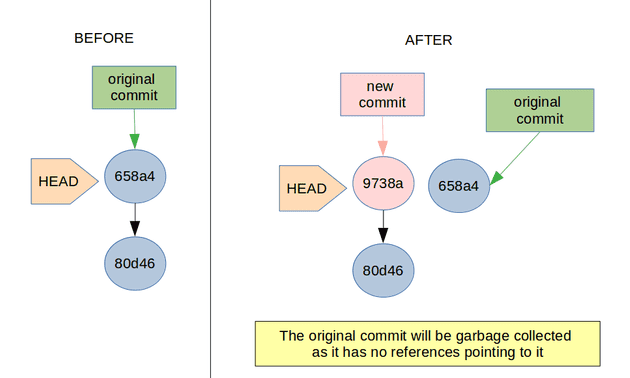
Try it yourself
Let’s look at the command in action. I urge you to try these steps out on a local repo to get a better understanding. Except for git, no installations are necessary. I am using VS code, however, these commands can be run directly in the terminal.
- Create a folder. And a file with some initial text.
- Open git bash or terminal in that folder and run
git initin the folder to initialize a git repository. - Add and commit changes.
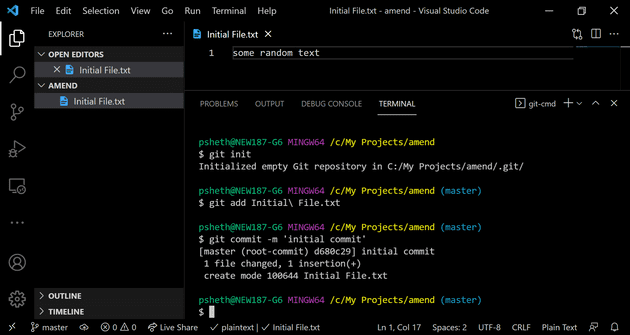
- We will now modify this initial commit. Add a new file and delete the current file.
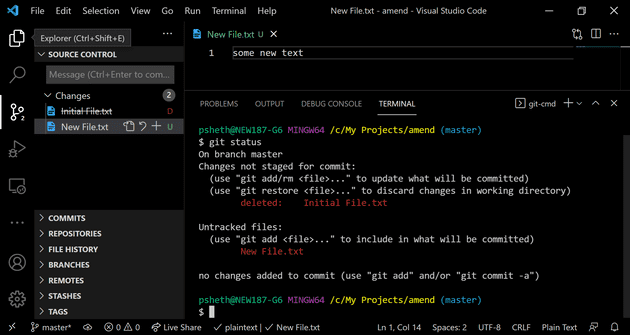
- Stage the changes using
git add . - Commit changes using
git commit --amend -m 'amend initial commit'Notice that the previous commit d680c29 is replaced with the new one 980dc84.
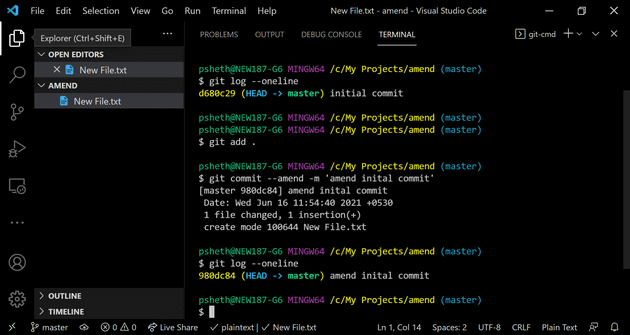
Note: To retain the commit message, use git commit --amend --no-edit
cherry-pick
Picks commits from other branches and adds them to the current branch. It creates duplicate commits.
Situations where cherry-pick is useful:
- Team Collaboration - when you want to use code in a particular commit on someone’s branch without merging their branch into yours. Cherry-pick that commit onto your branch.
- Bug hotfixes - when master branch has a bug that needs to be fixed immediately and is already fixed on develop.Cherry-pick the commit on master from develop.
How cherry-pick works:
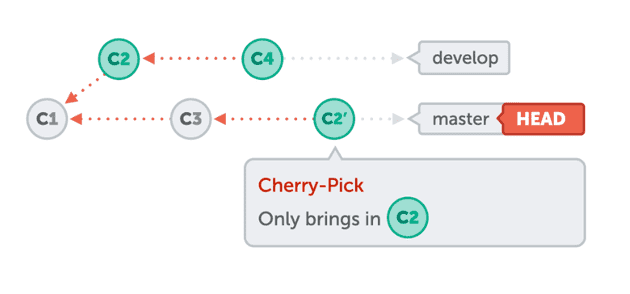
Try it yourself
Time to look at the command in action. Again, please try these steps out on a local repo to get a better understanding. It takes hardly 10 mins.
- Create a folder. And a file with some initial text.
- Open git bash or terminal in that folder and run
git initin the folder to initialize a git repository. - Add and commit changes.
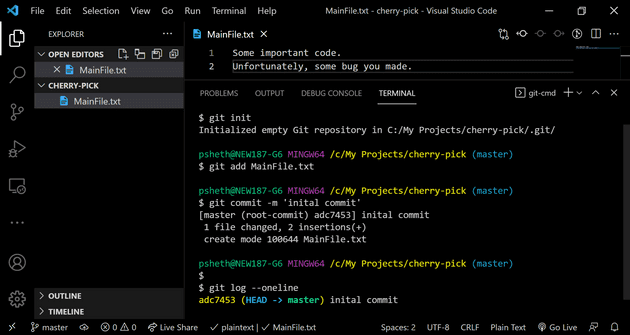
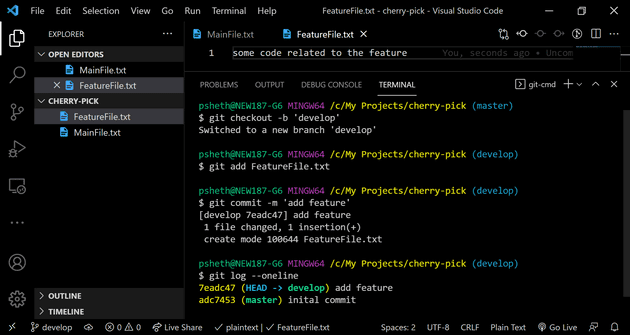
- Create a new branch ‘develop’ using
git checkout -b 'develop' - Add a new file, stage the changes and commit.
- Assume that you found the bug in the MainFile and fix it. Just update some text in the MainFile and commit the change in ‘develop’.
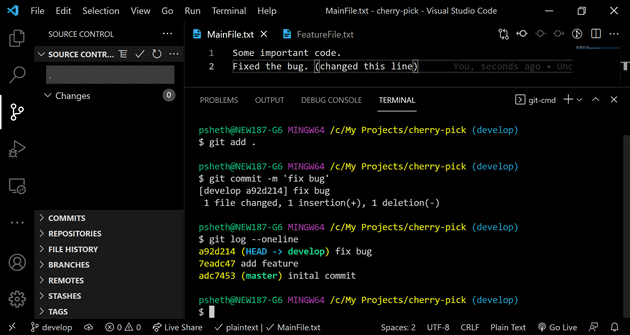
- Time to cherry-pick the last commit (bugfix) from ‘develop’ to ‘master’. Go to ‘master’ branch with
git checkout master. - Execute
git cherry-pick <commit sha>. It’sa92d214in this case. On ‘develop’ rungit log --onelineto know the ‘commit sha’
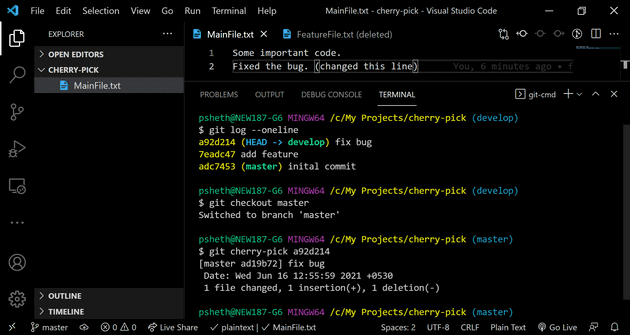
Note: To avoid creating a new commit, but get the changes of a particular commit, use the --no-commit option with cherry-pick. Similarly, --edit can be used to edit the commit message.
References:
- https://www.git-tower.com/learn/git/ebook/
- https://www.atlassian.com/git/tutorials
- https://git-scm.com/docs/
Congratulations on reaching the end. 🎉 To get notified about other posts in this series,